Would you be interested in incorporating an “Author Box Without Use no-Plugin with Schema Optimized” into your WordPress site? Adding an author bio box can significantly enhance the authenticity of your blog. While many themes offer the convenience of displaying an author bio box through default functionality, certain themes may lack this built-in feature. In such cases, you have the option to manually enable it and showcase the author bio box within your post’s section.
Importantly, the utilization of a plugin is not a mandatory requirement. In this article, we will guide you through the process of enabling the author box without resorting to a plugin, all while ensuring auto Schema Optimization. To delve deeper into this topic, you can explore Schema Markup Best Practices for additional insights.
The Significance of an Author Box
In the context of a website featuring multiple authors or a single author dedicated to blog writing, the introduction of an author bio becomes crucial. An author bio plays a pivotal role in establishing trust with your readers. It goes beyond just providing basic information such as a name and photo; it offers the opportunity to put a human face to the narrative. This humanizing element not only fosters a sense of connection but also contributes to cultivating strong relationships with your readers.
Moreover, the author box serves as a convenient platform to include essential links, such as those to the author’s website, Twitter, and Facebook profiles. By incorporating these links, readers can effortlessly connect and follow the author on various social media platforms. This seamless integration enhances engagement and interaction, creating a well-rounded and interactive experience for your audience.
Step 1: Enter Your Biographical Information
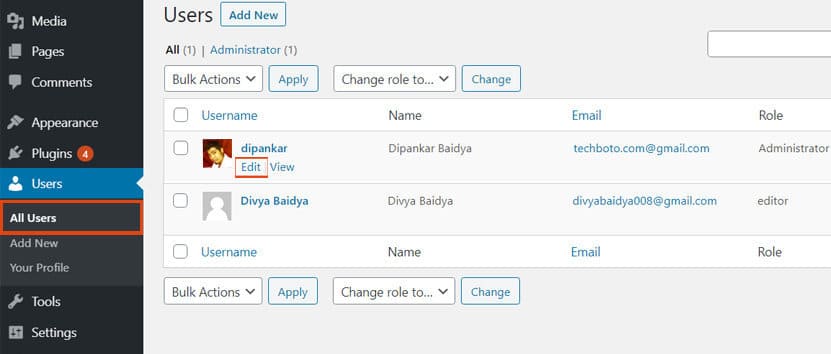
To get started, navigate to your website’s login page and access the wp-admin dashboard. From there, proceed to Users → All Users →
Upon reaching this section, click on Users. Now, hover over the specific user for whom you wish to provide additional information. As the “Edit” button becomes visible, proceed to click on it.
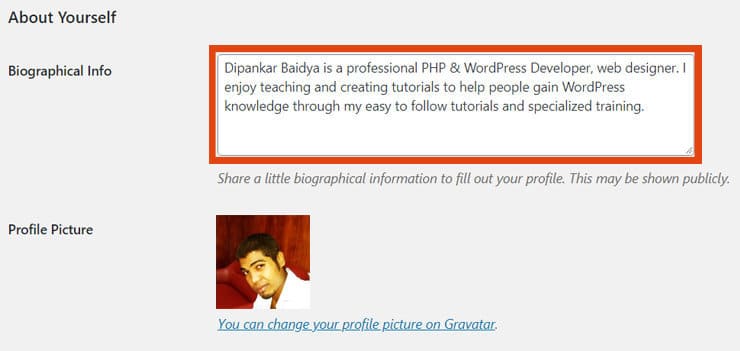
Now, proceed to scroll down until you locate the “Biographical Info” section. Within this section, you’ll find the Biographical Info box where you can input your description. Here, you also have the option to utilize HTML coding to manually insert links to your social media profiles. Feel free to include any relevant information you wish to appear in your author box, and don’t forget to save your changes afterwards.
Step 2: Implementing PHP Code for Optimized Author Bio Box Schema
In this step, we’ll furnish you with the necessary PHP code to seamlessly display the optimized Author Bio Box within your post pages. Follow these instructions to ensure precise implementation:
- Navigate to the sidebar menu and access Appearance → Theme Editor.
- Locate and select the “single.php” file from the available options.
- Insert the provided PHP code in the appropriate location within the file.
By following these steps, you’ll effectively integrate the optimized Author Bio Schema into your post pages.
<div class="site-content">
<div class="author-box clear" itemprop="author" itemscope="" itemtype="https://schema.org/Person">
<span itemprop="image" alt="Photo of <?php the_author_meta( 'display_name' ); ?>">
<?php if(function_exists('get_avatar')) { echo get_avatar( get_the_author_meta('email'), '100','','author image' ); } ?>
</span>

<div class="author-meta"><h4 class="author-name">
<span>	<a itemprop="url" rel="author" href="<?php echo esc_url( get_author_posts_url( get_the_author_meta( 'ID' ) ) ); ?>" itemprop="name">
<itemscope>About the <?php the_author_meta( 'display_name' ); ?></a>
</span></h4>

<div class="author-desc" itemprop="description">
<?php the_author_meta('description') ?>
</div>
</div>
</div>
</div>
Before you paste the PHP code into the file, it’s important to determine the specific location on the post page where you want the author box to appear. An optimal placement is right below each article, creating an author information box that readers can easily access. This location serves as an effective spot to showcase your author bio.
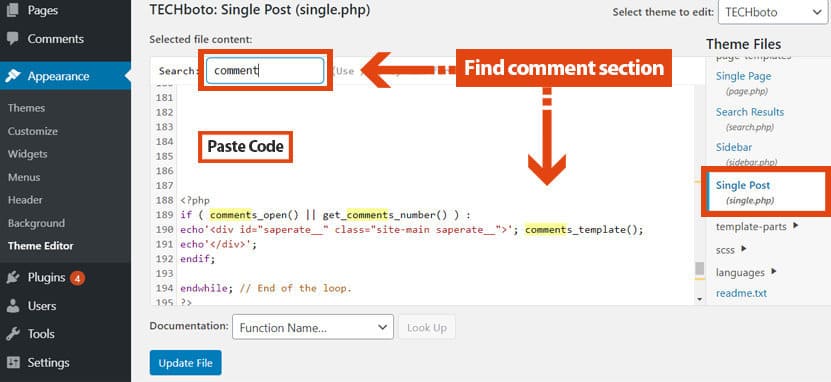
Now, as you review the contents of the single.php file, follow these straightforward steps:
- Open the single.php file.
- To locate the ideal insertion point, perform a search using the “Ctrl+f” shortcut and search for the term “comment.”
- Once you find the section just above the comment area, you can confidently insert the provided PHP code.
By following these instructions, you’ll seamlessly integrate the author box into the desired position on the post page.
This code efficiently retrieves the author’s details and presents them beneath WordPress posts. We’ve comprehensively outlined the validation process and the method to exhibit the author’s name, Gravatar image, and description for each of these elements.
However, if you find yourself uncertain, revert to the initial step outlined above. It entails a check: if Biographical Info has not been added, the author bio won’t be displayed at all. This ensures a seamless user experience, displaying author information only when relevant details are available.
Step 3: Applying CSS Code for Author Box Styling
Moving forward, we will enhance the appearance of the authors’ bio box by incorporating custom CSS. To achieve the desired styling for your author box, you can insert the following customized CSS code. Don’t hesitate to modify the code to align with your specific preferences.
You have two distinct options for pasting the CSS code to alter the style of the author box:
- Access the Appearance → Theme Editor → Stylesheet (style.css) menu and paste the code at the end of the existing code lines.
- Alternatively, if you opt for the second method, you can paste the CSS code directly within the same page, single.php. If you choose this approach, remember to enclose the CSS code within style tags like this:
<style>Paste CSS code</style>CSS code:
.author-box {
    padding: 15px 0 15px 0;
}
.author-box .avatar {
    border-radius: 50%;
    float: left;
    width: 72px;
    height: auto;
    line-height: 0.8;
    margin: 0 15px 0 0;
}
.author-box .author-meta {
    display: table;
}
.author-box .author-meta .author-name {
    font-size: 16px;
    margin-bottom: 5px;
    font-size: 18px;
    padding-bottom: 10px;
}
.author-box .author-meta .author-name a:hover {
    color: rgb(118, 44, 255); /*change color as theme */
}
.author-box .author-meta .author-desc {
    margin-bottom: 5px;
}
Select the method that best suits your workflow and requirements to effortlessly apply the desired style enhancements to the author box.
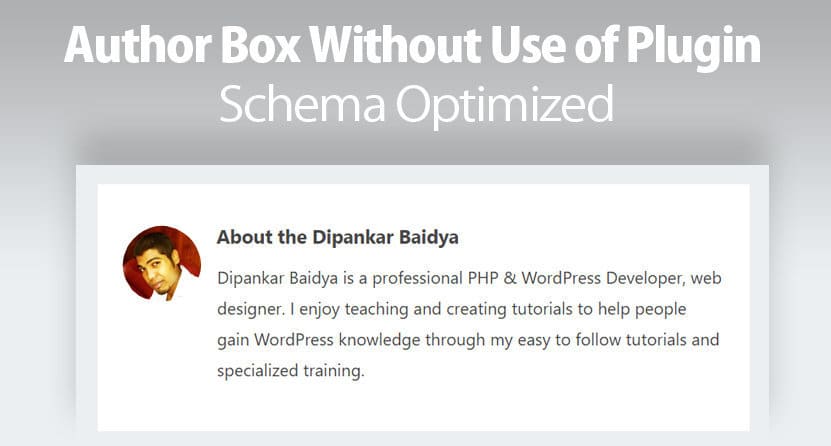
So, once you’ve incorporated this CSS code into your project, the frontend presentation of your site will resemble the example below:
Conclusion: That’s the process for seamlessly integrating the author bio box without the need for a plugin, all while ensuring schema optimization, into your WordPress site. This article has presented you with a comprehensive guide to effortlessly adding an attractive, captivating, and attention-grabbing author bio box within a matter of minutes. If you find yourself still uncertain and eager to learn more about this topic, please feel free to reach out via the comment section below, and we’ll be more than happy to provide further assistance.