Posted on Leave a comment

Author Box Without Use no-Plugin with Schema Optimized to WordPress

Would you be interested in incorporating an “Author Box Without Use no-Plugin with Schema Optimized” into your WordPress site? Adding an author bio box can significantly enhance the authenticity of your blog. While many themes offer the convenience of displaying an author bio box through default functionality, certain themes may lack this built-in feature. In such cases, you have the option to manually enable it and showcase the author bio box within your post’s section.

Importantly, the utilization of a plugin is not a mandatory requirement. In this article, we will guide you through the process of enabling the author box without resorting to a plugin, all while ensuring auto Schema Optimization. To delve deeper into this topic, you can explore Schema Markup Best Practices for additional insights.

The Significance of an Author Box

In the context of a website featuring multiple authors or a single author dedicated to blog writing, the introduction of an author bio becomes crucial. An author bio plays a pivotal role in establishing trust with your readers. It goes beyond just providing basic information such as a name and photo; it offers the opportunity to put a human face to the narrative. This humanizing element not only fosters a sense of connection but also contributes to cultivating strong relationships with your readers.

Moreover, the author box serves as a convenient platform to include essential links, such as those to the author’s website, Twitter, and Facebook profiles. By incorporating these links, readers can effortlessly connect and follow the author on various social media platforms. This seamless integration enhances engagement and interaction, creating a well-rounded and interactive experience for your audience.

Step 1: Enter Your Biographical Information

To get started, navigate to your website’s login page and access the wp-admin dashboard. From there, proceed to Users → All Users →

Upon reaching this section, click on Users. Now, hover over the specific user for whom you wish to provide additional information. As the “Edit” button becomes visible, proceed to click on it.

Now, proceed to scroll down until you locate the “Biographical Info” section. Within this section, you’ll find the Biographical Info box where you can input your description. Here, you also have the option to utilize HTML coding to manually insert links to your social media profiles. Feel free to include any relevant information you wish to appear in your author box, and don’t forget to save your changes afterwards.

Step 2: Implementing PHP Code for Optimized Author Bio Box Schema

In this step, we’ll furnish you with the necessary PHP code to seamlessly display the optimized Author Bio Box within your post pages. Follow these instructions to ensure precise implementation:

  1. Navigate to the sidebar menu and access Appearance → Theme Editor.
  2. Locate and select the “single.php” file from the available options.
  3. Insert the provided PHP code in the appropriate location within the file.

By following these steps, you’ll effectively integrate the optimized Author Bio Schema into your post pages.

<div class="site-content">	
<div class="author-box clear" itemprop="author" itemscope="" itemtype="https://schema.org/Person">
<span itemprop="image" alt="Photo of <?php the_author_meta( 'display_name' ); ?>">
<?php if(function_exists('get_avatar')) { echo get_avatar( get_the_author_meta('email'), '100','','author image' ); } ?>
</span>

<div class="author-meta"><h4 class="author-name">
<span>	<a itemprop="url" rel="author" href="<?php echo esc_url( get_author_posts_url( get_the_author_meta( 'ID' ) ) ); ?>" itemprop="name">
<itemscope>About the <?php the_author_meta( 'display_name' ); ?></a>
</span></h4>

<div class="author-desc" itemprop="description">
<?php the_author_meta('description') ?>
</div>
</div>
</div>
</div>


Before you paste the PHP code into the file, it’s important to determine the specific location on the post page where you want the author box to appear. An optimal placement is right below each article, creating an author information box that readers can easily access. This location serves as an effective spot to showcase your author bio.

Now, as you review the contents of the single.php file, follow these straightforward steps:

  1. Open the single.php file.
  2. To locate the ideal insertion point, perform a search using the “Ctrl+f” shortcut and search for the term “comment.”
  3. Once you find the section just above the comment area, you can confidently insert the provided PHP code.

By following these instructions, you’ll seamlessly integrate the author box into the desired position on the post page.

This code efficiently retrieves the author’s details and presents them beneath WordPress posts. We’ve comprehensively outlined the validation process and the method to exhibit the author’s name, Gravatar image, and description for each of these elements.

However, if you find yourself uncertain, revert to the initial step outlined above. It entails a check: if Biographical Info has not been added, the author bio won’t be displayed at all. This ensures a seamless user experience, displaying author information only when relevant details are available.

Step 3: Applying CSS Code for Author Box Styling

Moving forward, we will enhance the appearance of the authors’ bio box by incorporating custom CSS. To achieve the desired styling for your author box, you can insert the following customized CSS code. Don’t hesitate to modify the code to align with your specific preferences.

You have two distinct options for pasting the CSS code to alter the style of the author box:

  1. Access the Appearance → Theme Editor → Stylesheet (style.css) menu and paste the code at the end of the existing code lines.
  2. Alternatively, if you opt for the second method, you can paste the CSS code directly within the same page, single.php. If you choose this approach, remember to enclose the CSS code within style tags like this:
<style>Paste CSS code</style>

CSS code:

.author-box {
    padding: 15px 0 15px 0;
}
.author-box .avatar {
    border-radius: 50%;
    float: left;
    width: 72px;
    height: auto;
    line-height: 0.8;
    margin: 0 15px 0 0;
}
.author-box .author-meta {
    display: table;
}
.author-box .author-meta .author-name {
    font-size: 16px;
    margin-bottom: 5px;
    font-size: 18px;
    padding-bottom: 10px;
}
.author-box .author-meta .author-name a:hover {
    color: rgb(118, 44, 255); /*change color as theme */
}
.author-box .author-meta .author-desc {
    margin-bottom: 5px;
}

Select the method that best suits your workflow and requirements to effortlessly apply the desired style enhancements to the author box.

So, once you’ve incorporated this CSS code into your project, the frontend presentation of your site will resemble the example below:

Conclusion: That’s the process for seamlessly integrating the author bio box without the need for a plugin, all while ensuring schema optimization, into your WordPress site. This article has presented you with a comprehensive guide to effortlessly adding an attractive, captivating, and attention-grabbing author bio box within a matter of minutes. If you find yourself still uncertain and eager to learn more about this topic, please feel free to reach out via the comment section below, and we’ll be more than happy to provide further assistance.

Posted on Leave a comment

How to Add Image Title/alt Tag no plugin WordPress Solve in One Step Image SEO

Enhance Image SEO: Add Title and alt Tags to All WordPress Images in One Simple Step, Is your website filled with images lacking proper titles and alt tag? If you’ve noticed that WordPress doesn’t automatically include title attributes for your post images, it’s time to address this issue and improve your image SEO. Title and alt attributes play a crucial role, providing mouse hover tooltips that significantly enhance readability for your readers.

In this comprehensive tutorial, we will guide you through the process of using a WordPress hook to effortlessly add title tag and alt tag attributes to all your images. With just one step, you can activate title tags for every image on your WordPress site, boosting its overall user experience and SEO performance.

Effortlessly Enhance Your WordPress Images with Title Tags: Adding title attributes to your images is a breeze. While numerous methods exist, I’ll guide you through the most straightforward and up-to-date approach, requiring just three lines of code—no plugins necessary. Follow along as I walk you through the process of adding title tags to your images using this method

What Does “Image Title / alt” Refer To?

In essence, the image title serves as the label for your image. Similar to alt text, it provides both users and search engines with insight into the image’s content. However, unlike alt text, the image title/alt remains hidden when the image is absent or fails to load correctly. Instead, it becomes visible when a user hovers their mouse pointer over the image.

Step 1: Adding Title Tags to All Featured Images

To achieve this, simply insert the following code into your WordPress file located at: wp-includes → media.php

'title' => $attachment->post_title,

You can find this line bellow mention

$default_attr = array(

Paste code an exact location check image bellow

Step 2: Adding Title Tags to All Images within Posts

You can accomplish this by following the same procedure and inserting the code into the WordPress file found at: wp-includes → media.php

title="'.trim( strip_tags( get_post_meta( $attachment_id, '_wp_attachment_image_alt', true ) ) ).'" 

You can locate this line as indicated below.

if ( is_string( $sizes ) ) {

Paste code at exact location check image bellow

Upon adding an image to your post, you’ll notice that title attributes are automatically appended, as depicted in the Insert Image screen below. Follow these steps: Select the desired image from the media library. On the right-hand side, a set of text boxes will be visible. Populate the Title text box and then click the “Insert into Page” button.

Please note that the aforementioned techniques will be effective for all images with pre-existing titles. I highly recommend incorporating descriptive titles for each image to enhance the user experience with tooltips upon mouse hover. Ultimately, a well-structured and organized blog or website will pave the way for the success you aspire to achieve in the future.

Posted on Leave a comment

1kb or Less Social Share Buttons for WordPress URLs Without Plugin

By exploring the WordPress repository and generating social share URLs for platforms like Facebook, Twitter, Reddit, LinkedIn, WhatsApp, and more, we offer WordPress users a code solution that seamlessly integrates with your site. This eliminates the need for any manual adjustments, providing your site’s visitors with a convenient means to share or appreciate the content.

Our solution revolves around a remarkably compact file, totaling less than 1kb, housing the entire collection of social share URLs. This minimal file size ensures a simple modification that won’t adversely impact your page loading speed. Recognize that sluggish site performance isn’t merely an inconvenience for users; it can also detrimentally affect your Google Site Ranking and the placement of your pages within the SERP (Search Engine Result Page).

Within this guide, you’ll gain insight into effortlessly crafting social share links or buttons for prominent platforms such as Facebook, Twitter, LinkedIn, and Reddit. These elements can be seamlessly integrated into your WordPress site, as well as in an HTML or PHP version. Facilitating content sharing is of utmost importance, as it contributes to enhancing your website’s overall popularity.

Discover the Optimal Locations for Placing Social Share Links

The conventional approach for situating social share links involves positioning them immediately above and below the main content of your webpage or blog post. This practice applies whether you’re operating within a WordPress environment or utilizing an HTML or PHP framework. By adhering to these straightforward steps, you can effortlessly generate your own social share URLs.

Step 1: Configure the Styling of Social Media Buttons

To initiate the styling process for your social media buttons, follow these steps:

  1. Log in to your WordPress admin panel.
  2. Navigate to “Appearance” and select “Theme Editor.”
  3. Locate and access the “style.css” file.

Once you’re in the “style.css” file, insert the provided code snippet designed for button styling.

.shareon{ width: fit-content;float: left; margin-right: 15px; margin: 15px;}
.social-con{ width: max-content; display: inline-block; padding: 10px 10px 8px 10px; border: 1px solid gainsboro; border-radius: 2px; }
.social-con a{ display: inherit;}
.backco_ svg{ width: 23px; padding: 5px; border-radius: 2px; }
.facebook svg{ background:#3b5998; }
.twitter svg{ background:#55acee;}
.reddit svg{ background:#ff4500;}
.linkedin svg{ background:#007bb5;}
.whatsapp svg{ background:#12af0a;}
.telegram svg{ background:#2ca5e0;}
.pocket svg{ background:#ee4056;}
.blogger svg{ background:#fda352;}

Step 2: Integrate Share Button Where Desired

Embed the HTML code at your preferred location on the page, whether it’s at the top, bottom, or even both sides. Utilize the following code snippet for seamless integration:

<h2 class="shareon">Share on: </h2>
<div class="social-con">
<a href="#facebook" class="facebook backco_" title="Facebook"><svg focusable="false" xmlns="http://www.w3.org/2000/svg" viewBox="0 0 32 32"><path fill="#FFF" d="M17.78 27.5V17.008h3.522l.527-4.09h-4.05v-2.61c0-1.182.33-1.99 2.023-1.99h2.166V4.66c-.375-.05-1.66-.16-3.155-.16-3.123 0-5.26 1.905-5.26 5.405v3.016h-3.53v4.09h3.53V27.5h4.223z"></path></svg></a>

<a href="#twitter" class="twitter backco_" title="Twitter"><svg focusable="false" xmlns="http://www.w3.org/2000/svg" viewBox="0 0 32 32"><path fill="#FFF" d="M28 8.557a9.913 9.913 0 0 1-2.828.775 4.93 4.93 0 0 0 2.166-2.725 9.738 9.738 0 0 1-3.13 1.194 4.92 4.92 0 0 0-3.593-1.55 4.924 4.924 0 0 0-4.794 6.049c-4.09-.21-7.72-2.17-10.15-5.15a4.942 4.942 0 0 0-.665 2.477c0 1.71.87 3.214 2.19 4.1a4.968 4.968 0 0 1-2.23-.616v.06c0 2.39 1.7 4.38 3.952 4.83-.414.115-.85.174-1.297.174-.318 0-.626-.03-.928-.086a4.935 4.935 0 0 0 4.6 3.42 9.893 9.893 0 0 1-6.114 2.107c-.398 0-.79-.023-1.175-.068a13.953 13.953 0 0 0 7.55 2.213c9.056 0 14.01-7.507 14.01-14.013 0-.213-.005-.426-.015-.637.96-.695 1.795-1.56 2.455-2.55z"></path></svg></a>

<a href="#reddit" class="reddit backco_" title="Reddit"><svg focusable="false" xmlns="http://www.w3.org/2000/svg" viewBox="0 0 32 32"><path d="M28.543 15.774a2.953 2.953 0 0 0-2.951-2.949 2.882 2.882 0 0 0-1.9.713 14.075 14.075 0 0 0-6.85-2.044l1.38-4.349 3.768.884a2.452 2.452 0 1 0 .24-1.176l-4.274-1a.6.6 0 0 0-.709.4l-1.659 5.224a14.314 14.314 0 0 0-7.316 2.029 2.908 2.908 0 0 0-1.872-.681 2.942 2.942 0 0 0-1.618 5.4 5.109 5.109 0 0 0-.062.765c0 4.158 5.037 7.541 11.229 7.541s11.22-3.383 11.22-7.541a5.2 5.2 0 0 0-.053-.706 2.963 2.963 0 0 0 1.427-2.51zm-18.008 1.88a1.753 1.753 0 0 1 1.73-1.74 1.73 1.73 0 0 1 1.709 1.74 1.709 1.709 0 0 1-1.709 1.711 1.733 1.733 0 0 1-1.73-1.711zm9.565 4.968a5.573 5.573 0 0 1-4.081 1.272h-.032a5.576 5.576 0 0 1-4.087-1.272.6.6 0 0 1 .844-.854 4.5 4.5 0 0 0 3.238.927h.032a4.5 4.5 0 0 0 3.237-.927.6.6 0 1 1 .844.854zm-.331-3.256a1.726 1.726 0 1 1 1.709-1.712 1.717 1.717 0 0 1-1.712 1.712z" fill="#fff"></path></svg></a>

<a href="#linkedin" class="linkedin backco_" title="Linkedin"><svg focusable="false" xmlns="http://www.w3.org/2000/svg" viewBox="0 0 32 32"><path d="M6.227 12.61h4.19v13.48h-4.19V12.61zm2.095-6.7a2.43 2.43 0 0 1 0 4.86c-1.344 0-2.428-1.09-2.428-2.43s1.084-2.43 2.428-2.43m4.72 6.7h4.02v1.84h.058c.56-1.058 1.927-2.176 3.965-2.176 4.238 0 5.02 2.792 5.02 6.42v7.395h-4.183v-6.56c0-1.564-.03-3.574-2.178-3.574-2.18 0-2.514 1.7-2.514 3.46v6.668h-4.187V12.61z" fill="#FFF"></path></svg></a>

<a href="#whatsapp" class="whatsapp backco_" title="WhatsApp"><svg focusable="false" xmlns="http://www.w3.org/2000/svg" viewBox="0 0 32 32"><path fill-rule="evenodd" clip-rule="evenodd" fill="#FFF" d="M16.21 4.41C9.973 4.41 4.917 9.465 4.917 15.7c0 2.134.592 4.13 1.62 5.832L4.5 27.59l6.25-2.002a11.241 11.241 0 0 0 5.46 1.404c6.234 0 11.29-5.055 11.29-11.29 0-6.237-5.056-11.292-11.29-11.292zm0 20.69c-1.91 0-3.69-.57-5.173-1.553l-3.61 1.156 1.173-3.49a9.345 9.345 0 0 1-1.79-5.512c0-5.18 4.217-9.4 9.4-9.4 5.183 0 9.397 4.22 9.397 9.4 0 5.188-4.214 9.4-9.398 9.4zm5.293-6.832c-.284-.155-1.673-.906-1.934-1.012-.265-.106-.455-.16-.658.12s-.78.91-.954 1.096c-.176.186-.345.203-.628.048-.282-.154-1.2-.494-2.264-1.517-.83-.795-1.373-1.76-1.53-2.055-.158-.295 0-.445.15-.584.134-.124.3-.326.45-.488.15-.163.203-.28.306-.47.104-.19.06-.36-.005-.506-.066-.147-.59-1.587-.81-2.173-.218-.586-.46-.498-.63-.505-.168-.007-.358-.038-.55-.045-.19-.007-.51.054-.78.332-.277.274-1.05.943-1.1 2.362-.055 1.418.926 2.826 1.064 3.023.137.2 1.874 3.272 4.76 4.537 2.888 1.264 2.9.878 3.43.85.53-.027 1.734-.633 2-1.297.266-.664.287-1.24.22-1.363-.07-.123-.26-.203-.54-.357z"></path></svg></a>

<a href="#telegram" class="telegram backco_" title="Telegram"><svg focusable="false" xmlns="http://www.w3.org/2000/svg" viewBox="0 0 32 32"><path fill="#FFF" d="M25.515 6.896L6.027 14.41c-1.33.534-1.322 1.276-.243 1.606l5 1.56 1.72 5.66c.226.625.115.873.77.873.506 0 .73-.235 1.012-.51l2.43-2.363 5.056 3.734c.93.514 1.602.25 1.834-.863l3.32-15.638c.338-1.363-.52-1.98-1.41-1.577z"></path></svg></a>

<a href="#pocket" class="pocket backco_" title="Pocket"><svg focusable="false" xmlns="http://www.w3.org/2000/svg" viewBox="0 0 32 32"><path fill="#FFF" d="M16.005 6.244c2.927 0 5.854-.002 8.782 0 1.396.002 2.195.78 2.188 2.165-.015 2.483.116 4.985-.11 7.454-.75 8.204-10.027 12.607-16.91 8.064-3.086-2.037-4.82-4.926-4.917-8.673-.06-2.34-.034-4.684-.018-7.025.008-1.214.812-1.98 2.056-1.983 2.975-.01 5.952-.005 8.93-.007zm-5.037 5.483c-.867.093-1.365.396-1.62 1.025-.27.67-.078 1.256.417 1.732a529.74 529.74 0 0 0 5.09 4.838c.745.695 1.537.687 2.278-.01a473.74 473.74 0 0 0 4.93-4.686c.827-.797.91-1.714.252-2.38-.694-.704-1.583-.647-2.447.17-1.097 1.04-2.215 2.06-3.266 3.143-.485.492-.77.432-1.227-.027a87.392 87.392 0 0 0-3.39-3.225c-.325-.29-.77-.448-1.017-.584z"></path></svg></a>

<a href="#blogger" class="blogger backco_" title="Blogger"><svg focusable="false" xmlns="http://www.w3.org/2000/svg" viewBox="0 0 32 32"><path fill="#FFF" d="M25.793 14.325l-.166-.344-.277-.214c-.363-.284-2.2.02-2.695-.43-.352-.324-.404-.905-.51-1.69-.197-1.527-.322-1.606-.56-2.122-.866-1.836-3.214-3.217-4.825-3.408h-4.367c-3.436 0-6.244 2.814-6.242 6.248v7.29c0 3.428 2.81 6.238 6.248 6.238h7.174c3.436 0 6.225-2.81 6.244-6.237l.04-5.048-.06-.277zM12.47 11.22h3.464c.66 0 1.195.534 1.195 1.188 0 .653-.54 1.195-1.2 1.195h-3.46c-.66 0-1.194-.542-1.194-1.195 0-.654.535-1.19 1.195-1.19zm7.038 9.526H12.47c-.66 0-1.194-.54-1.194-1.188 0-.654.535-1.19 1.195-1.19h7.04c.655 0 1.19.536 1.19 1.19 0 .646-.535 1.188-1.19 1.188z"></path></svg></a>
</div>

Step 3: Substitution and Linking to Your Content

For Facebook Social Share URL:

https://www.facebook.com/sharer.php?u=[post-url]

For WordPress Replace:

https://www.facebook.com/sharer.php?u=

Twitter Social Share URL:

https://twitter.com/share?url=[post-url]&text=[post-title]&via=[via]&hashtags=[hashtags]

For WordPress Replace:

https://twitter.com/share?url=&text=&via=

Reddit Social Share URL:

https://reddit.com/submit?url=[post-url]&title=[post-title]

For WordPress Replace:

https://reddit.com/submit?url=&title=https://reddit.com/submit?url=[post-url]&title=[post-title]

Linkedin Social Share URL:

https://www.linkedin.com/shareArticle?url=[post-url]&title=[post-title]

For WordPress Replace:

https://www.linkedin.com/shareArticle?url=&title=

WhatsApp Social Share URL:

https://wa.me/?text=[post-title] | [post-url]

For WordPress Replace:

https://wa.me/?text= | 

Telegram Social Share URL:

https://telegram.me/share/url?url=[post-url]&text=[post-title]

For WordPress Replace:

https://telegram.me/share/url?url=&text=

Pocket Social Share URL:

https://getpocket.com/save?url=[post-url]&title=[post-title]

For WordPress Replace:

https://getpocket.com/save?url=&title=

Blogger Social Share URL:

https://www.blogger.com/blog_this.pyra?u=[post-url]&n=[post-title]&t=[post-description]

For WordPress Replace:

https://www.blogger.com/blog_this.pyra?u=&n=&t=

WordPress Social Share URL:

https://wordpress.com/press-this.php?u=[post-url]&t=[post-title]&s=[post-desc]&i=[post-img]

For WordPress Replace:

https://wordpress.com/press-this.php?u=&t=&s=

Evernote Social Share URL:

https://www.evernote.com/clip.action?url=[post-url]&title=[post-title]

For WordPress Replace:

https://www.evernote.com/clip.action?url=&title=

Delicious Social Share URL:

https://delicious.com/save?v=5&provider=[provider]&noui&jump=close&url=[post-url]&title=[post-title]

For WordPress Replace:

https://delicious.com/save?v=5x&provider=&noui&jump=close&url=&title=

StumbleUpon Social Share URL:

https://www.stumbleupon.com/submit?url=[post-url]&title=[post-title]

For WordPress Replace:

https://www.stumbleupon.com/submit?url=&title=

I trust you find the aforementioned URLs valuable for your social sharing buttons. We warmly encourage you to share your button configurations on your website within the comments section. Your feedback is greatly appreciated, and we are eager to hear your thoughts and suggestions for crafting share links or sharing buttons for various other social networks.

Posted on Leave a comment

WordPress cache leverage no plugin browser loading faster .htaccess

Would you like to enhance the performance of your WordPress website with an easy method? You can achieve this by following these straightforward steps. Caching is a technique that boosts your website’s speed. It involves storing cached files in the user’s browser, eliminating the need for repeated downloads. In essence, this leads to quicker loading times as data is already stored in the user’s browser, thus accelerating your WordPress site. Let’s enhance the speed and optimization of your WordPress website immediately.

Step 1: Evaluate Your Website’s Loading Time

Initially, it’s crucial to obtain your website’s speed result as a percentage. This step holds significant importance since, prior to proceeding with any further steps, it allows you to gauge your website’s speed and overall performance. To achieve this, assess your site’s speed by using Google PageSpeed Insights, which will provide you with your current score.

Step 2: Access Your .htaccess File

Locate the .htaccess file in the root directory of your website. If you’re not already in the root directory, navigate to it. In case you can’t find the .htaccess file, follow these steps: Go to the top right corner, click on “Settings,” then enable the option to display hidden files by checking ‘Show all hidden files.’ With this setting enabled, you should be able to access the .htaccess file. Click on it to open and make necessary edits.

Step 3: Modify the .htaccess File

You can copy the provided codes below and paste them into your .htaccess file. To establish expiration times for resources like images, HTML, JavaScript, and CSS files, a minor adjustment to your file is necessary. Choose values that align with your site’s needs; typically, a duration of 1 month suffices.

#EDITMODIFY
#Customize expires caching start - adjust the period according to your needs
<IfModule mod_expires.c>
  FileETag MTime Size
  AddOutputFilterByType DEFLATE text/plain text/html text/xml text/css application/xml application/xhtml+xml application/rss+xml application/javascript application/x-javascript
  ExpiresActive On
  ExpiresByType text/html "access 600 seconds"
  ExpiresByType application/xhtml+xml "access 600 seconds"
  ExpiresByType text/css "access 1 month"
  ExpiresByType text/javascript "access 1 month"
  ExpiresByType text/x-javascript "access 1 month"
  ExpiresByType application/javascript "access 1 month"
  ExpiresByType application/x-javascript "access 1 month"
  ExpiresByType application/x-shockwave-flash "access 1 month"
  ExpiresByType application/pdf "access 1 month"
  ExpiresByType image/x-icon "access 1 year"
  ExpiresByType image/jpg "access 1 year"  
  ExpiresByType image/jpeg "access 1 year"
  ExpiresByType image/png "access 1 year"
  ExpiresByType image/gif "access 1 year"
  ExpiresDefault "access 1 month"
</IfModule>
#Expires caching end

# BEGIN Cache-Control Headers
<IfModule mod_expires.c>
  <IfModule mod_headers.c>
    <filesMatch "\.(ico|jpe?g|png|gif|swf)$">
      Header append Cache-Control "public"  
    </filesMatch>
    <filesMatch "\.(css)$">
      Header append Cache-Control "public"
    </filesMatch>
    <filesMatch "\.(js)$">
      Header append Cache-Control "private"
    </filesMatch>
    <filesMatch "\.(x?html?|php)$">
      Header append Cache-Control "private, must-revalidate"
    </filesMatch>
  </IfModule>
</IfModule>

# Disable ETags
<IfModule mod_headers.c>
	Header unset ETag
</IfModule>

Step 4: Reassess Your Website’s Speed

Conduct another evaluation of your website’s performance by using Google PageSpeed Insights to observe your updated score.

Step 4: Reevaluate Your Website’s Speed

Perform a retest of your website’s speed using Google PageSpeed Insights in order to observe and assess your newly updated score.

References for Further Enhancement: Take into account the tutorials provided below to enhance your website’s speed and optimization more effectively. In the aforementioned steps, we have highlighted various methods to ensure effective browser caching and the reuse of downloaded content.

Posted on Leave a comment

Notification Bar Without Plugin 1kb Simple Paste Code

Many of the WordPress plugins for cookies give consent to unnecessary scripts and code, ultimately leading to a decrease in website performance. This results in slower loading times due to the excessive download of scripts, as well as unwanted CSS and JavaScript elements. I have discovered a single line of code that, when implemented, outperforms WordPress plugins.

Employing this code to create notification bars within WordPress is an effective method for making announcements and enhancing user engagement. To achieve this without affecting your site’s performance, follow the tutorial below on crafting a WordPress notification bar without utilizing a plugin.

Here is how it looks:

<style>.note-left{ float: left; padding: 7px 0px;color: #313131;} #cookies-bar{color: #fff; font-family: inherit;background: #f5f5f5;padding: 15px 23px;position: fixed;bottom: 0;left: 0;width: 100%;margin: 0px;visibility: hidden;z-index: 99999;box-sizing: border-box;box-shadow: 0 -7px 19px -9px #000000c9;}.acpt-rgt{padding: 8px 12px;background: #397aff;border-radius: 8px;float: right; cursor: pointer;}</style>

<p id="cookies-bar"><span class="note-left">We use cookies to offer you a better browsing experience</span><span class="acpt-rgt" onclick="acceptCookie(); return false;">Accept cookies</span></p>

<script>function acceptCookie(){ document.cookie="cookiesclick=1; expires=Fri, 26 Dec 2025 12:00:00 UTC;path=/", document.getElementById("cookies-bar").style.visibility="hidden"; return false; } document.cookie.indexOf("cookiesclick")<0&&(document.getElementById("cookies-bar").style.visibility="visible"); </script>

Paste Code:

Below, you’ll find the HTML, CSS, and JavaScript code that you should utilize for the cookie notification bar. To ensure proper placement, follow these steps:

  1. Log in to your WordPress admin panel.
  2. Navigate to “Appearance” and select “Theme Editor.”
  3. Locate and edit the “footer.php” file.

Insert the provided code in the appropriate section as mentioned above.

Now, you can relish a remarkably swift notification bar without the need for a plugin, completely free of resource-intensive scripts or animations. If you found this guide helpful for creating a WordPress Notification Bar without the use of a plugin by simply pasting the provided code, kindly share your feedback in the comments section below.

Posted on Leave a comment

jQuery Cookies Bar Form Set Cookie WordPress

Creating a Cookies Bar becomes remarkably straightforward, particularly in contrast to conventional JavaScript, when incorporated into a WordPress site using jQuery. This article demonstrates the process of establishing, retrieving, and purging cookies through jQuery, offering an effortless method for WordPress users to adopt and employ.

Within this realm of options for reading, setting, and eliminating cookies, occasions may arise where the extensive feature set is excessive, prompting a preference for a streamlined yet efficient resolution.

I’ve outlined jQuery functions that I find favorable for seamlessly and promptly managing cookie-related tasks. Integrating these functions into a JavaScript file facilitates their utilization.

I have generated a basic trio of files: “index.html” for the webpage structure, “style.css” for styling, and “cookie.js” for JavaScript functionality.

Keep in mind that you have the option to employ jQuery cookies across various platform frameworks, including WordPress.

Step 1: Generate a file named “index.html” (For integrating with WordPress, navigate to Login → Appearance → footer.php)

Initially, an index file is required to execute and establish cookies on your website. (For WordPress users, please copy and paste the contents exclusively within the body tag.)

<!doctype html>
<head>
  <meta charset="utf-8">  
  <title>How to set cookies with JavaScript Demo</title>  
  <link rel="stylesheet" type="text/css" href="style.css" />  
</head>
<body>
  <!-- For WordPress users copy start -->
  <div id="container">
    <div class="message  cookie__set_message  hid__sec">
	  <p>Displayed only the first time you visit this page. Refresh to hide it!</p>
	  
      <p>Even when you refresh the page, the browser remembers your option.</p>
    </div>

    <div class="message  cookie__onclc  hid__sec">
      <p>Set Cookies hide this message, by clicking the  &ldquo;&times;&rdquo; on the right of this box <a href="#?" class="close" title="Hide This Message">&times;</a></p>
      <p>This is a new message. Even when you refresh the page, the browser remembers your option.</p>
    </div>
  </div>

  <footer>
    <div class="reset">To reset, <a href="">remove the cookies</a>.</div>  
  </footer>
  <script type="text/javascript" src="http://code.jquery.com/jquery-1.9.1.min.js"></script>
  <script type="text/javascript" src="cookie.js"></script>  
  <script type="text/JavaScript">
    $(document).ready(function() {
      // COOKIES
      if ($.cookie('hide-after-load') == 'yes') {
        $('.cookie__set_message').removeClass('hid__sec');
        $('.cookie__set_message').addClass('hide--first');
      }
      // if the cookie is true, hide the initial message and show the other one
      if ($.cookie('hide-after-click') == 'yes') {
        $('.cookie__onclc').removeClass('hid__sec');
        $('.cookie__onclc').addClass('hide--first');
      }
      // add cookie to hide the first message after load (on refresh it will be hidden)
      $.cookie('hide-after-load', 'yes', {expires: 7 });
      $('.close').click(function() {
        if (!$('.cookie__onclc').is('hide--first')) {
          $('.cookie__onclc').removeClass('hid__sec');
          $('.cookie__onclc').addClass('hide--first');
          $.cookie('hide-after-click', 'yes', {expires: 7 });
        }
        return false;
      })
      //reset the cookies (not shown in tutorial)
      $('.reset a').click(function() {
        if (!$(this).hasClass('clicked')) {
          $(this).addClass('clicked');
          // add cookie setting that user has clicked
          $.cookie('hide-after-load', 'no', {expires: 7 });
          $.cookie('hide-after-click', 'no', {expires: 7 });
        }
        location.reload();
      });
    });
  </script>
<!-- For WordPress users copy start -->
</body>
</html>


Step 2: Generate the “style.css” file (For WordPress, navigate to Appearance → style.css)

body { font-family: "Helvetica Neue", 'Helvetica', sans-serif; color: #666; margin: 1em; line-height: 2; } a:link, a:visited { color: #f00; text-decoration: none; padding-bottom: 0.1875em; } a:hover{ color: #fe580f; cursor: pointer; }
  /* For WordPress Start */ 
  .hide--first > *:first-child {
    display: none;
  }
  .hid__sec > *:last-child {
    display: none;
  }
  /* For WordPress End */ 
  .message { text-align: center; width: 42%; padding: 0 2%; float: left; background: #f5deff; } .message:last-of-type { float: right; } .close { color: #f00; position: absolute; text-transform: lowercase; right: 20px; font-size: 1.5em; top: 10px; line-height: 1; border: none !important; } p.info { font-size: 19px; margin-bottom: 50px; text-align: center; } p.info span { color: #666 } footer:before{ content: ""; display: table; clear: both; } footer { padding-top: 40%; color: #888; text-align: center; }

Step 3: Create the “cookie.js” file

/*!
 * jQuery Cookie Plugin v1.4.0
 * https://github.com/carhartl/jquery-cookie
 *
 * Copyright 2013 Klaus Hartl
 * Released under the MIT license
 */
(function (factory) { if (typeof define === 'function' && define.amd) { define(['jquery'], factory); } else { factory(jQuery); }}(function ($) { var pluses = /\+/g; function encode(s) { return config.raw ? s : encodeURIComponent(s); } function decode(s) { return config.raw ? s : decodeURIComponent(s); } function stringifyCookieValue(value) { return encode(config.json ? JSON.stringify(value) : String(value)); } function parseCookieValue(s) { if (s.indexOf('"') === 0) { s = s.slice(1, -1).replace(/\\"/g, '"').replace(/\\\\/g, '\\'); } try { s = decodeURIComponent(s.replace(pluses, ' ')); return config.json ? JSON.parse(s) : s; } catch(e) {} } function read(s, converter) { var value = config.raw ? s : parseCookieValue(s); return $.isFunction(converter) ? converter(value) : value; } var config = $.cookie = function (key, value, options) { if (value !== undefined && !$.isFunction(value)) { options = $.extend({}, config.defaults, options); if (typeof options.expires === 'number') { var days = options.expires, t = options.expires = new Date(); t.setTime(+t + days * 864e+5); } return (document.cookie = [ encode(key), '=', stringifyCookieValue(value), options.expires ? '; expires=' + options.expires.toUTCString() : '', options.path ? '; path=' + options.path : '', options.domain ? '; domain=' + options.domain : '', options.secure ? '; secure' : '' ].join('')); } var result = key ? undefined : {}; var cookies = document.cookie ? document.cookie.split('; ') : []; for (var i = 0, l = cookies.length; i < l; i++) { var parts = cookies[i].split('='); var name = decode(parts.shift()); var cookie = parts.join('='); if (key && key === name) { result = read(cookie, value); break; } if (!key && (cookie = read(cookie)) !== undefined) { result[name] = cookie; } } return result; }; config.defaults = {}; $.removeCookie = function (key, options) { if ($.cookie(key) === undefined) { return false; } $.cookie(key, '', $.extend({}, options, { expires: -1 })); return !$.cookie(key); };}));

Please bear in mind that you can execute this code on your local computer by running it through XAMPP or any Apache server. I trust you found this tutorial enjoyable and perhaps gathered some inspiration for your upcoming projects.

Posted on Leave a comment

WordPress Contact Form Enabling Email Delivery Without Plugins

There is a wide range of plugins that can be utilized to incorporate a contact form into your WordPress site. However, it is also possible to achieve this functionality without relying on a plugin by implementing PHP and jQuery code. This approach involves creating a WordPress form builder from scratch, enabling the submission of user information via email to both the user and the website administrator.

To implement a “Start Process” feature and request the creation of a contact form, you will require an HTML form, a small jQuery script, and a PHP file to handle the email delivery process. This setup enables the form to be submitted by the user, triggering an action that sends an email to both the user and the website administrator. Follow the steps below to create a contact form in WordPress without using a plugin, while ensuring email delivery

Step 1: Creating a Page with a Custom Name (e.g., Contact or Contact Us)

To create a page with a custom name, such as “Contact” or “Contact Us,” follow these steps:

  1. Open your web browser and go to your WordPress admin dashboard.
  2. In the left sidebar, click on “Pages.”
  3. From the dropdown menu, select “Add New.”
  4. In the page editor, enter the desired title for your page, such as “Contact” or “Contact Us.”

By following these steps, you will successfully create a custom contact page with the desired name and content, enhancing the overall appearance and functionality of your WordPress website.

Step 2: Building the Form

Now that you have created the “Contact” or “Contact Us” page, let’s proceed to add a basic form with fields for name, email, dropdown, and message. Follow these steps:

  1. Open the WordPress editor for the “Contact” or “Contact Us” page.
  2. Click on the “+” icon to add a new block.
  3. Search for the “Custom HTML” block and select it.
  4. In the Custom HTML block, paste the following code:
<label>Your Name <small id="name_error"></small></label>
<input type="text" name="name" id="name">
<label>Email <small id="email_error"></small></label>
<input type="text" name="email" id="email">
<label>Subject</label>
<select style="width:100%" name="subject" id="subject">
<option>Option-1</option>
<option>Option-2</option></select>
<label>Message</label>
<textarea name="message" id="message"></textarea><br>
<input type="button" value="Submit" id="form_submit">

Save it

Step 3: Data Processing and Error Handling

Our current form appears visually appealing; however, it lacks functionality as it does not include validation or email submission. To address this issue, we need to implement the following steps: first, verify that the form has been submitted, and second, validate whether all fields have been correctly filled or not.

Please paste the following code below. To do this, navigate to “Appearance” and select “Theme File Editor” from the right sidebar. Look for “Theme Files” and locate “footer.php”. Finally, paste the script provided below on the last line of the “footer.php” file.

<script>
(function($){ 
$("#form_submit").click(function(){
if($("#name").val()==""){
$("#name_error").html(" (Please enter your name)");
return false;
}
if($("#email").val()==""){
$("#email_error").html(" (Please enter your email)");
return false;
}
if(!(/^([a-zA-Z0-9_.+-])+\@(([a-zA-Z0-9-])+\.)+([a-zA-Z0-9]{2,4})+$/.test($("#email").val()))){
$("#email_error").html(" (Invalid email)");
return false;
}
$("#form_submit").val("Please wait...").css("pointer-events","none");
$.ajax({
url: "/demo/data_form.php",
data: 'name='+$("#name").val()+
'&email='+$("#email").val()+
'&subject='+$("#subject").val()+
'&message='+$("#message").val(),
type: 'post',
success: function (response)
{
if(response=="mailsubmit"){
alert("Thank you, Request has been sent successfully - We will contact you soon...");
}			
if(response=="mailnotsend"){
alert("ERROR Message could not be sent!");
}
$("#form_submit").val("Submit").css("pointer-events","");
$("#name").val("");
$("#email").val("");
$("#message").val("");	
}
});
})
})(jQuery);</script>

Please note that modifying theme files directly can be risky, so it is recommended to create a backup of the file before making any changes.

Step 4: Creating PHP Mailer for Both User and Admin

First, navigate to your WordPress directory and locate the file upload section. This can typically be found in the server directory path where the wp-admin folder is located. Once you’ve accessed the file upload section, proceed with the following steps:

  1. Create a new folder called “demo” within the WordPress directory.
  2. Inside the “demo” folder, create a PHP file named “data_form.php”. This step is necessary because we referenced this file’s URL path (“/demo/data_form.php”) in the Ajax script mentioned earlier.
  3. Open the “data_form.php” file and insert the code provided below:
<?php
error_reporting(0);
if(isset($_POST['name'])){
$name=$_POST['name'];
$email=$_POST['email'];
$subject=$_POST['subject'];
$message=$_POST['message'];
$date=date("d-m-Y");
$subject = "New Contact $name";
$tomessage="Thank you for choosing us.. !!<br>
Our expert will contact you soon..!!<br>
keep visit our site.. !!<br>
<a href='https://www.andamantech.com/' target='_blank'>Andaman Tech</a>";
$tosubject = "Thank you $name for conatct us";
$message = '<table width="643" border="0" cellspacing="2" cellpadding="2" style="border: 4px solid #ff810099;border-radius: 34px;margin: 0 auto;">
<tbody><tr><td colspan="2" align="center" style="padding: 10px 0px;"><span style="color: #267dff;font-weight: bold;font-family: Arial, Helvetica, sans-serif;font-size: 20px;"> - Your Company Name - </span></td>
</tr><tr><td colspan="2" align="center" bgcolor="#FFFFFF"><span style="font-size: 16px;font-family: Arial, Helvetica, sans-serif;font-weight: bold;color: #EA5E00;">&nbsp;Contact Details</span></td>
</tr><tr><td colspan="2" bgcolor="#f7f7f7">&nbsp;</td>
</tr><tr><td width="156"><span style="font-family:Arial, Helvetica, sans-serif;font-size:14px;color:#000000;">Name</span></td>
<td width="469"><span style="font-family:Arial, Helvetica, sans-serif;font-size:14px;color:#000000;">';
$message .= $_POST['name'];
$message .='</span></td>
</tr><tr><td><span style="font-family:Arial, Helvetica, sans-serif;font-size:14px;color:#000000;">Email</span></td>
<td><span style="font-family:Arial, Helvetica, sans-serif;font-size:14px;color:#000000;">';
$message .= $_POST['email'];
$message .='</span></td>
</tr><tr><td><span style="font-family:Arial, Helvetica, sans-serif;font-size:14px;color:#000000;">Subject: </span></td>
<td><span style="font-family:Arial, Helvetica, sans-serif;font-size:14px;color:#000000;">';
$message .= $_POST['subject'];
$message .='</span></td>
</tr><tr><td><span style="font-family:Arial, Helvetica, sans-serif;font-size:14px;color:#000000;">Message: </span></td>
<td><span style="font-family:Arial, Helvetica, sans-serif;font-size:14px;color:#000000;">';
$message .= $_POST['message'];
$message .='</span></td>
</tr><tr><td><span style="font-family:Arial, Helvetica, sans-serif;font-size:14px;color:#000000;">Date: </span></td>
<td><span style="font-family:Arial, Helvetica, sans-serif;font-size:14px;color:#000000;">';
$message .= $date;
$message .='</span></td>
</tr><tr><td colspan="2" bgcolor="#f7f7f7">&nbsp;</td></tr><tr><td colspan="2" align="center"><span style="font-family:Arial, Helvetica, sans-serif;font-size:11px;"><a href="http://localhost/wp?ref=mail-service" target="_blank" style="color: #a5a5a5;">Developed by - Andaman Tech</a></span></td></tr></tbody>
</table>';
$headers  = 'MIME-Version: 1.0' . "\r\n";
$headers .= 'content-type: text/html; charset=iso-8859-1' . "\r\n";
$headers .= 'From: Your website name<[email protected]>'."\r\n";
if(mail("[email protected]",$subject,$message,$headers)) 
{
mail($_POST['email'],$tosubject,$tomessage,$headers);

echo "mailsubmit";
}
else
{
echo "mailnotsend";
}
}

After pasting the code into the “data_form.php” file, save it. You have now successfully created the folder and PHP file in the WordPress directory, which will handle the functionality to send emails to both users who submit the contact form and the admin.

Step 5: Make the necessary modifications to your email id

In order for the email functionality to work correctly, you need to update the email settings. Follow the steps below:

  1. Open the “data_form.php” file in a text editor.
  2. Locate the following line of code:
<[email protected]>
  1. Replace ‘[email protected]’ with the actual email address where you want to receive the contact form submissions. For example:
<[email protected]>

Save the changes to the “data_form.php” file.

With the updated code, the form submission will only proceed if all the required fields are filled and a valid email address is provided. If any errors occur, an appropriate error message will be displayed. Remember to replace ‘[email protected]’ with your actual email address to receive the contact form submissions.

Note: If you are running your website on a local server, the email functionality may not work as expected due to server limitations. However, if you are using an online hosting service, please ensure that you replace the email address with your working email address for the code to function correctly.

I hope you find this article helpful. If you do, please consider sharing it on social media. Additionally, if you notice any mistakes or have suggestions for a tutorial on creating a WordPress contact form with enabling email delivery Without Plugins, which includes sending emails to both the user and admin, please leave a comment below. Your feedback is greatly appreciated.

Posted on Leave a comment

How to Load a WordPress Page Without Refreshing Using jQuery Ajax


If you’re looking to achieve fast page loading for WordPress pages without refreshing using jQuery AJAX, and you prefer not to use plugins, you’re in luck. I will provide you with all the necessary details on how to implement this feature in WordPress. By simply copying and pasting the provided code into the correct location, your website will load quickly, whether it’s hosted on a server or running locally on your computer.

The optimal approach in this case is to create a post and publish it, as it will automatically work on all website pages and the navigation menu. Whenever you encounter a loader animation after performing an action on the page, it indicates that a jQuery AJAX request is being sent to the server, which affects the loading time.

In this comprehensive article, I will guide you through the step-by-step process of creating and managing jQuery AJAX loading for WordPress pages and post pages. By implementing a simple code snippet and file, you will enable seamless loading without the need to refresh your website. This feature will greatly enhance the user experience for your readers.

Step 1: Getting Started

To begin, navigate to the following directory: wp-content -> themes -> Your Theme Name. Inside your theme’s folder, create a new folder with any desired name (e.g., “loader_boom”). This folder will be used to store the necessary files for implementing the loader functionality.

Next, create a file named “ajax_loads.js”. This JavaScript file will be responsible for handling the AJAX loading functionality on your WordPress site.

(function(window,undefined){ var History = window.History, $ = window.jQuery, document = window.document; if ( !History.enabled ) return false; $(function(){ var	rootUrl = reload_helper['rootUrl'],	contentSelector = '#' + reload_helper['container_id'], $content = $(contentSelector),	contentNode = $content.get(0), $body = $(document.body),	scrollOptions = {	duration: 800,	easing:'swing'	};	if ( $content.length === 0 ) $content = $body; $.expr[':'].internal = function(obj, index, meta, stack){ var		$this = $(obj),	url = $this.attr('href')||'',		isInternalLink; isInternalLink = url.substring(0,rootUrl.length) === rootUrl || url.indexOf(':') === -1;	return isInternalLink; };	var documentHtml = function(html){	var result = String(html).replace(/<\!DOCTYPE[^>]*>/i, '') .replace(/<(html|head|body|title|script)([\s\>])/gi,'<div id="document-$1"$2') .replace(/<\/(html|head|body|title|script)\>/gi,'</div>');	return result;	}; $.fn.wp_reload = function(){ var $this = $(this);	$this.find('a:internal:not(.no-ajaxy,[href^="#"],[href*="wp-login"],[href*="wp-admin"])').on('click', function(event){ var	$this	= $(this),	url		= $this.attr('href'),	title 	= $this.attr('title') || null; if ( event.which == 2 || event.metaKey ) return true;		History.pushState(null,title,url); event.preventDefault();	return false;	}); return $this;	}; $body.wp_reload(); $(window).bind('statechange',function(){ var		State 		= History.getState(),	url			= State.url, relativeUrl = url.replace(rootUrl,''); $.ajax({	url: url,	success: function(data, textStatus, jqXHR){ var	$data 			= $(documentHtml(data)), $dataBody		= $data.find('#document-body:first ' + contentSelector), bodyClasses 	= $data.find('#document-body:first').attr('class'),	contentHtml, $scripts; var $menu_list = $data.find('.' + reload_helper['mcdc']);	jQuery('body').attr('class', bodyClasses); $scripts = $dataBody.find('#document-script');	if ( $scripts.length ) $scripts.detach(); contentHtml = $dataBody.html()||$data.html(); if ( !contentHtml ) {		document.location.href = url; return false;	}	$content.stop(true,true); $content.html(contentHtml) .wp_reload()	.css('text-align', '') .animate({opacity: 1, visibility: "visible"}); if ( '' != reload_helper['scrollTop'] ) { jQuery('html, body').animate({	scrollTop: jQuery(contentSelector).offset().top }, 1000);	}	$('.' + reload_helper['mcdc']).html($menu_list.html()); $body.wp_reload();	$(reload_helper['ids']).each(function(){ jQuery(this).addClass('no-ajaxy'); });		document.title = $data.find('#document-title:first').text(); try { document.getElementsByTagName('title')[0].innerHTML = document.title.replace('<','&lt;') .replace('>','&gt;') .replace(' & ',' &amp; '); } catch ( Exception ) { }	$scripts.each(function(){	var scriptText = $(this).html(); if ( '' != scriptText ) { scriptNode = document.createElement('script'); scriptNode.appendChild(document.createTextNode(scriptText)); contentNode.appendChild(scriptNode); } else {	$.getScript( $(this).attr('src') );	}	}); if ( typeof window.pageTracker !== 'undefined' ) window.pageTracker._trackPageview(relativeUrl); if ( typeof window.reinvigorate !== 'undefined' && typeof window.reinvigorate.ajax_track !== 'undefined' ) reinvigorate.ajax_track(url);	},	error: function(jqXHR, textStatus, errorThrown){ document.location.href = url; return false;	}	});	}); }); })(window);

Step 2: Creating an Additional File named “ajax_history.js”

In addition to the “ajax_loads.js” file, create another file called “ajax_history.js”. This JavaScript file will be utilized to manage the history of AJAX requests on your WordPress site.

window.JSON||(window.JSON={}),function(){function f(a){return a<10?"0"+a:a}function quote(a){return escapable.lastIndex=0,escapable.test(a)?'"'+a.replace(escapable,function(a){var b=meta[a];return typeof b=="string"?b:"\\u"+("0000"+a.charCodeAt(0).toString(16)).slice(-4)})+'"':'"'+a+'"'}function str(a,b){var c,d,e,f,g=gap,h,i=b[a];i&&typeof i=="object"&&typeof i.toJSON=="function"&&(i=i.toJSON(a)),typeof rep=="function"&&(i=rep.call(b,a,i));switch(typeof i){case"string":return quote(i);case"number":return isFinite(i)?String(i):"null";case"boolean":case"null":return String(i);case"object":if(!i)return"null";gap+=indent,h=[];if(Object.prototype.toString.apply(i)==="[object Array]"){f=i.length;for(c=0;c<f;c+=1)h[c]=str(c,i)||"null";return e=h.length===0?"[]":gap?"[\n"+gap+h.join(",\n"+gap)+"\n"+g+"]":"["+h.join(",")+"]",gap=g,e}if(rep&&typeof rep=="object"){f=rep.length;for(c=0;c<f;c+=1)d=rep[c],typeof d=="string"&&(e=str(d,i),e&&h.push(quote(d)+(gap?": ":":")+e))}else for(d in i)Object.hasOwnProperty.call(i,d)&&(e=str(d,i),e&&h.push(quote(d)+(gap?": ":":")+e));return e=h.length===0?"{}":gap?"{\n"+gap+h.join(",\n"+gap)+"\n"+g+"}":"{"+h.join(",")+"}",gap=g,e}}"use strict",typeof Date.prototype.toJSON!="function"&&(Date.prototype.toJSON=function(a){return isFinite(this.valueOf())?this.getUTCFullYear()+"-"+f(this.getUTCMonth()+1)+"-"+f(this.getUTCDate())+"T"+f(this.getUTCHours())+":"+f(this.getUTCMinutes())+":"+f(this.getUTCSeconds())+"Z":null},String.prototype.toJSON=Number.prototype.toJSON=Boolean.prototype.toJSON=function(a){return this.valueOf()});var JSON=window.JSON,cx=/[\u0000\u00ad\u0600-\u0604\u070f\u17b4\u17b5\u200c-\u200f\u2028-\u202f\u2060-\u206f\ufeff\ufff0-\uffff]/g,escapable=/[\\\"\x00-\x1f\x7f-\x9f\u00ad\u0600-\u0604\u070f\u17b4\u17b5\u200c-\u200f\u2028-\u202f\u2060-\u206f\ufeff\ufff0-\uffff]/g,gap,indent,meta={"\b":"\\b","\t":"\\t","\n":"\\n","\f":"\\f","\r":"\\r",'"':'\\"',"\\":"\\\\"},rep;typeof JSON.stringify!="function"&&(JSON.stringify=function(a,b,c){var d;gap="",indent="";if(typeof c=="number")for(d=0;d<c;d+=1)indent+=" ";else typeof c=="string"&&(indent=c);rep=b;if(!b||typeof b=="function"||typeof b=="object"&&typeof b.length=="number")return str("",{"":a});throw new Error("JSON.stringify")}),typeof JSON.parse!="function"&&(JSON.parse=function(text,reviver){function walk(a,b){var c,d,e=a[b];if(e&&typeof e=="object")for(c in e)Object.hasOwnProperty.call(e,c)&&(d=walk(e,c),d!==undefined?e[c]=d:delete e[c]);return reviver.call(a,b,e)}var j;text=String(text),cx.lastIndex=0,cx.test(text)&&(text=text.replace(cx,function(a){return"\\u"+("0000"+a.charCodeAt(0).toString(16)).slice(-4)}));if(/^[\],:{}\s]*$/.test(text.replace(/\\(?:["\\\/bfnrt]|u[0-9a-fA-F]{4})/g,"@").replace(/"[^"\\\n\r]*"|true|false|null|-?\d+(?:\.\d*)?(?:[eE][+\-]?\d+)?/g,"]").replace(/(?:^|:|,)(?:\s*\[)+/g,"")))return j=eval("("+text+")"),typeof reviver=="function"?walk({"":j},""):j;throw new SyntaxError("JSON.parse")})}(),function(a,b){"use strict";var c=a.History=a.History||{},d=a.jQuery;if(typeof c.Adapter!="undefined")throw new Error("History.js Adapter has already been loaded...");c.Adapter={bind:function(a,b,c){d(a).bind(b,c)},trigger:function(a,b,c){d(a).trigger(b,c)},extractEventData:function(a,c,d){var e=c&&c.originalEvent&&c.originalEvent[a]||d&&d[a]||b;return e},onDomLoad:function(a){d(a)}},typeof c.init!="undefined"&&c.init()}(window),function(a,b){"use strict";var c=a.document,d=a.setTimeout||d,e=a.clearTimeout||e,f=a.setInterval||f,g=a.History=a.History||{};if(typeof g.initHtml4!="undefined")throw new Error("History.js HTML4 Support has already been loaded...");g.initHtml4=function(){if(typeof g.initHtml4.initialized!="undefined")return!1;g.initHtml4.initialized=!0,g.enabled=!0,g.savedHashes=[],g.isLastHash=function(a){var b=g.getHashByIndex(),c;return c=a===b,c},g.saveHash=function(a){return g.isLastHash(a)?!1:(g.savedHashes.push(a),!0)},g.getHashByIndex=function(a){var b=null;return typeof a=="undefined"?b=g.savedHashes[g.savedHashes.length-1]:a<0?b=g.savedHashes[g.savedHashes.length+a]:b=g.savedHashes[a],b},g.discardedHashes={},g.discardedStates={},g.discardState=function(a,b,c){var d=g.getHashByState(a),e;return e={discardedState:a,backState:c,forwardState:b},g.discardedStates[d]=e,!0},g.discardHash=function(a,b,c){var d={discardedHash:a,backState:c,forwardState:b};return g.discardedHashes[a]=d,!0},g.discardedState=function(a){var b=g.getHashByState(a),c;return c=g.discardedStates[b]||!1,c},g.discardedHash=function(a){var b=g.discardedHashes[a]||!1;return b},g.recycleState=function(a){var b=g.getHashByState(a);return g.discardedState(a)&&delete g.discardedStates[b],!0},g.emulated.hashChange&&(g.hashChangeInit=function(){g.checkerFunction=null;var b="",d,e,h,i;return g.isInternetExplorer()?(d="historyjs-iframe",e=c.createElement("iframe"),e.setAttribute("id",d),e.style.display="none",c.body.appendChild(e),e.contentWindow.document.open(),e.contentWindow.document.close(),h="",i=!1,g.checkerFunction=function(){if(i)return!1;i=!0;var c=g.getHash()||"",d=g.unescapeHash(e.contentWindow.document.location.hash)||"";return c!==b?(b=c,d!==c&&(h=d=c,e.contentWindow.document.open(),e.contentWindow.document.close(),e.contentWindow.document.location.hash=g.escapeHash(c)),g.Adapter.trigger(a,"hashchange")):d!==h&&(h=d,g.setHash(d,!1)),i=!1,!0}):g.checkerFunction=function(){var c=g.getHash();return c!==b&&(b=c,g.Adapter.trigger(a,"hashchange")),!0},g.intervalList.push(f(g.checkerFunction,g.options.hashChangeInterval)),!0},g.Adapter.onDomLoad(g.hashChangeInit)),g.emulated.pushState&&(g.onHashChange=function(b){var d=b&&b.newURL||c.location.href,e=g.getHashByUrl(d),f=null,h=null,i=null,j;return g.isLastHash(e)?(g.busy(!1),!1):(g.doubleCheckComplete(),g.saveHash(e),e&&g.isTraditionalAnchor(e)?(g.Adapter.trigger(a,"anchorchange"),g.busy(!1),!1):(f=g.extractState(g.getFullUrl(e||c.location.href,!1),!0),g.isLastSavedState(f)?(g.busy(!1),!1):(h=g.getHashByState(f),j=g.discardedState(f),j?(g.getHashByIndex(-2)===g.getHashByState(j.forwardState)?g.back(!1):g.forward(!1),!1):(g.pushState(f.data,f.title,f.url,!1),!0))))},g.Adapter.bind(a,"hashchange",g.onHashChange),g.pushState=function(b,d,e,f){if(g.getHashByUrl(e))throw new Error("History.js does not support states with fragement-identifiers (hashes/anchors).");if(f!==!1&&g.busy())return g.pushQueue({scope:g,callback:g.pushState,args:arguments,queue:f}),!1;g.busy(!0);var h=g.createStateObject(b,d,e),i=g.getHashByState(h),j=g.getState(!1),k=g.getHashByState(j),l=g.getHash();return g.storeState(h),g.expectedStateId=h.id,g.recycleState(h),g.setTitle(h),i===k?(g.busy(!1),!1):i!==l&&i!==g.getShortUrl(c.location.href)?(g.setHash(i,!1),!1):(g.saveState(h),g.Adapter.trigger(a,"statechange"),g.busy(!1),!0)},g.replaceState=function(a,b,c,d){if(g.getHashByUrl(c))throw new Error("History.js does not support states with fragement-identifiers (hashes/anchors).");if(d!==!1&&g.busy())return g.pushQueue({scope:g,callback:g.replaceState,args:arguments,queue:d}),!1;g.busy(!0);var e=g.createStateObject(a,b,c),f=g.getState(!1),h=g.getStateByIndex(-2);return g.discardState(f,e,h),g.pushState(e.data,e.title,e.url,!1),!0}),g.emulated.pushState&&g.getHash()&&!g.emulated.hashChange&&g.Adapter.onDomLoad(function(){g.Adapter.trigger(a,"hashchange")})},typeof g.init!="undefined"&&g.init()}(window),function(a,b){"use strict";var c=a.console||b,d=a.document,e=a.navigator,f=a.sessionStorage||!1,g=a.setTimeout,h=a.clearTimeout,i=a.setInterval,j=a.clearInterval,k=a.JSON,l=a.alert,m=a.History=a.History||{},n=a.history;k.stringify=k.stringify||k.encode,k.parse=k.parse||k.decode;if(typeof m.init!="undefined")throw new Error("History.js Core has already been loaded...");m.init=function(){return typeof m.Adapter=="undefined"?!1:(typeof m.initCore!="undefined"&&m.initCore(),typeof m.initHtml4!="undefined"&&m.initHtml4(),!0)},m.initCore=function(){if(typeof m.initCore.initialized!="undefined")return!1;m.initCore.initialized=!0,m.options=m.options||{},m.options.hashChangeInterval=m.options.hashChangeInterval||100,m.options.safariPollInterval=m.options.safariPollInterval||500,m.options.doubleCheckInterval=m.options.doubleCheckInterval||500,m.options.storeInterval=m.options.storeInterval||1e3,m.options.busyDelay=m.options.busyDelay||250,m.options.debug=m.options.debug||!1,m.options.initialTitle=m.options.initialTitle||d.title,m.intervalList=[],m.clearAllIntervals=function(){var a,b=m.intervalList;if(typeof b!="undefined"&&b!==null){for(a=0;a<b.length;a++)j(b[a]);m.intervalList=null}},m.debug=function(){(m.options.debug||!1)&&m.log.apply(m,arguments)},m.log=function(){var a=typeof c!="undefined"&&typeof c.log!="undefined"&&typeof c.log.apply!="undefined",b=d.getElementById("log"),e,f,g,h,i;a?(h=Array.prototype.slice.call(arguments),e=h.shift(),typeof c.debug!="undefined"?c.debug.apply(c,[e,h]):c.log.apply(c,[e,h])):e="\n"+arguments[0]+"\n";for(f=1,g=arguments.length;f<g;++f){i=arguments[f];if(typeof i=="object"&&typeof k!="undefined")try{i=k.stringify(i)}catch(j){}e+="\n"+i+"\n"}return b?(b.value+=e+"\n-----\n",b.scrollTop=b.scrollHeight-b.clientHeight):a||l(e),!0},m.getInternetExplorerMajorVersion=function(){var a=m.getInternetExplorerMajorVersion.cached=typeof m.getInternetExplorerMajorVersion.cached!="undefined"?m.getInternetExplorerMajorVersion.cached:function(){var a=3,b=d.createElement("div"),c=b.getElementsByTagName("i");while((b.innerHTML="<!--[if gt IE "+ ++a+"]><i></i><![endif]-->")&&c[0]);return a>4?a:!1}();return a},m.isInternetExplorer=function(){var a=m.isInternetExplorer.cached=typeof m.isInternetExplorer.cached!="undefined"?m.isInternetExplorer.cached:Boolean(m.getInternetExplorerMajorVersion());return a},m.emulated={pushState:!Boolean(a.history&&a.history.pushState&&a.history.replaceState&&!/ Mobile\/([1-7][a-z]|(8([abcde]|f(1[0-8]))))/i.test(e.userAgent)&&!/AppleWebKit\/5([0-2]|3[0-2])/i.test(e.userAgent)),hashChange:Boolean(!("onhashchange"in a||"onhashchange"in d)||m.isInternetExplorer()&&m.getInternetExplorerMajorVersion()<8)},m.enabled=!m.emulated.pushState,m.bugs={setHash:Boolean(!m.emulated.pushState&&e.vendor==="Apple Computer, Inc."&&/AppleWebKit\/5([0-2]|3[0-3])/.test(e.userAgent)),safariPoll:Boolean(!m.emulated.pushState&&e.vendor==="Apple Computer, Inc."&&/AppleWebKit\/5([0-2]|3[0-3])/.test(e.userAgent)),ieDoubleCheck:Boolean(m.isInternetExplorer()&&m.getInternetExplorerMajorVersion()<8),hashEscape:Boolean(m.isInternetExplorer()&&m.getInternetExplorerMajorVersion()<7)},m.isEmptyObject=function(a){for(var b in a)return!1;return!0},m.cloneObject=function(a){var b,c;return a?(b=k.stringify(a),c=k.parse(b)):c={},c},m.getRootUrl=function(){var a=d.location.protocol+"//"+(d.location.hostname||d.location.host);if(d.location.port||!1)a+=":"+d.location.port;return a+="/",a},m.getBaseHref=function(){var a=d.getElementsByTagName("base"),b=null,c="";return a.length===1&&(b=a[0],c=b.href.replace(/[^\/]+$/,"")),c=c.replace(/\/+$/,""),c&&(c+="/"),c},m.getBaseUrl=function(){var a=m.getBaseHref()||m.getBasePageUrl()||m.getRootUrl();return a},m.getPageUrl=function(){var a=m.getState(!1,!1),b=(a||{}).url||d.location.href,c;return c=b.replace(/\/+$/,"").replace(/[^\/]+$/,function(a,b,c){return/\./.test(a)?a:a+"/"}),c},m.getBasePageUrl=function(){var a=d.location.href.replace(/[#\?].*/,"").replace(/[^\/]+$/,function(a,b,c){return/[^\/]$/.test(a)?"":a}).replace(/\/+$/,"")+"/";return a},m.getFullUrl=function(a,b){var c=a,d=a.substring(0,1);return b=typeof b=="undefined"?!0:b,/[a-z]+\:\/\//.test(a)||(d==="/"?c=m.getRootUrl()+a.replace(/^\/+/,""):d==="#"?c=m.getPageUrl().replace(/#.*/,"")+a:d==="?"?c=m.getPageUrl().replace(/[\?#].*/,"")+a:b?c=m.getBaseUrl()+a.replace(/^(\.\/)+/,""):c=m.getBasePageUrl()+a.replace(/^(\.\/)+/,"")),c.replace(/\#$/,"")},m.getShortUrl=function(a){var b=a,c=m.getBaseUrl(),d=m.getRootUrl();return m.emulated.pushState&&(b=b.replace(c,"")),b=b.replace(d,"/"),m.isTraditionalAnchor(b)&&(b="./"+b),b=b.replace(/^(\.\/)+/g,"./").replace(/\#$/,""),b},m.store={},m.idToState=m.idToState||{},m.stateToId=m.stateToId||{},m.urlToId=m.urlToId||{},m.storedStates=m.storedStates||[],m.savedStates=m.savedStates||[],m.normalizeStore=function(){m.store.idToState=m.store.idToState||{},m.store.urlToId=m.store.urlToId||{},m.store.stateToId=m.store.stateToId||{}},m.getState=function(a,b){typeof a=="undefined"&&(a=!0),typeof b=="undefined"&&(b=!0);var c=m.getLastSavedState();return!c&&b&&(c=m.createStateObject()),a&&(c=m.cloneObject(c),c.url=c.cleanUrl||c.url),c},m.getIdByState=function(a){var b=m.extractId(a.url),c;if(!b){c=m.getStateString(a);if(typeof m.stateToId[c]!="undefined")b=m.stateToId[c];else if(typeof m.store.stateToId[c]!="undefined")b=m.store.stateToId[c];else{for(;;){b=(new Date).getTime()+String(Math.random()).replace(/\D/g,"");if(typeof m.idToState[b]=="undefined"&&typeof m.store.idToState[b]=="undefined")break}m.stateToId[c]=b,m.idToState[b]=a}}return b},m.normalizeState=function(a){var b,c;if(!a||typeof a!="object")a={};if(typeof a.normalized!="undefined")return a;if(!a.data||typeof a.data!="object")a.data={};b={},b.normalized=!0,b.title=a.title||"",b.url=m.getFullUrl(m.unescapeString(a.url||d.location.href)),b.hash=m.getShortUrl(b.url),b.data=m.cloneObject(a.data),b.id=m.getIdByState(b),b.cleanUrl=b.url.replace(/\??\&_suid.*/,""),b.url=b.cleanUrl,c=!m.isEmptyObject(b.data);if(b.title||c)b.hash=m.getShortUrl(b.url).replace(/\??\&_suid.*/,""),/\?/.test(b.hash)||(b.hash+="?"),b.hash+="&_suid="+b.id;return b.hashedUrl=m.getFullUrl(b.hash),(m.emulated.pushState||m.bugs.safariPoll)&&m.hasUrlDuplicate(b)&&(b.url=b.hashedUrl),b},m.createStateObject=function(a,b,c){var d={data:a,title:b,url:c};return d=m.normalizeState(d),d},m.getStateById=function(a){a=String(a);var c=m.idToState[a]||m.store.idToState[a]||b;return c},m.getStateString=function(a){var b,c,d;return b=m.normalizeState(a),c={data:b.data,title:a.title,url:a.url},d=k.stringify(c),d},m.getStateId=function(a){var b,c;return b=m.normalizeState(a),c=b.id,c},m.getHashByState=function(a){var b,c;return b=m.normalizeState(a),c=b.hash,c},m.extractId=function(a){var b,c,d;return c=/(.*)\&_suid=([0-9]+)$/.exec(a),d=c?c[1]||a:a,b=c?String(c[2]||""):"",b||!1},m.isTraditionalAnchor=function(a){var b=!/[\/\?\.]/.test(a);return b},m.extractState=function(a,b){var c=null,d,e;return b=b||!1,d=m.extractId(a),d&&(c=m.getStateById(d)),c||(e=m.getFullUrl(a),d=m.getIdByUrl(e)||!1,d&&(c=m.getStateById(d)),!c&&b&&!m.isTraditionalAnchor(a)&&(c=m.createStateObject(null,null,e))),c},m.getIdByUrl=function(a){var c=m.urlToId[a]||m.store.urlToId[a]||b;return c},m.getLastSavedState=function(){return m.savedStates[m.savedStates.length-1]||b},m.getLastStoredState=function(){return m.storedStates[m.storedStates.length-1]||b},m.hasUrlDuplicate=function(a){var b=!1,c;return c=m.extractState(a.url),b=c&&c.id!==a.id,b},m.storeState=function(a){return m.urlToId[a.url]=a.id,m.storedStates.push(m.cloneObject(a)),a},m.isLastSavedState=function(a){var b=!1,c,d,e;return m.savedStates.length&&(c=a.id,d=m.getLastSavedState(),e=d.id,b=c===e),b},m.saveState=function(a){return m.isLastSavedState(a)?!1:(m.savedStates.push(m.cloneObject(a)),!0)},m.getStateByIndex=function(a){var b=null;return typeof a=="undefined"?b=m.savedStates[m.savedStates.length-1]:a<0?b=m.savedStates[m.savedStates.length+a]:b=m.savedStates[a],b},m.getHash=function(){var a=m.unescapeHash(d.location.hash);return a},m.unescapeString=function(b){var c=b,d;for(;;){d=a.unescape(c);if(d===c)break;c=d}return c},m.unescapeHash=function(a){var b=m.normalizeHash(a);return b=m.unescapeString(b),b},m.normalizeHash=function(a){var b=a.replace(/[^#]*#/,"").replace(/#.*/,"");return b},m.setHash=function(a,b){var c,e,f;return b!==!1&&m.busy()?(m.pushQueue({scope:m,callback:m.setHash,args:arguments,queue:b}),!1):(c=m.escapeHash(a),m.busy(!0),e=m.extractState(a,!0),e&&!m.emulated.pushState?m.pushState(e.data,e.title,e.url,!1):d.location.hash!==c&&(m.bugs.setHash?(f=m.getPageUrl(),m.pushState(null,null,f+"#"+c,!1)):d.location.hash=c),m)},m.escapeHash=function(b){var c=m.normalizeHash(b);return c=a.escape(c),m.bugs.hashEscape||(c=c.replace(/\%21/g,"!").replace(/\%26/g,"&").replace(/\%3D/g,"=").replace(/\%3F/g,"?")),c},m.getHashByUrl=function(a){var b=String(a).replace(/([^#]*)#?([^#]*)#?(.*)/,"$2");return b=m.unescapeHash(b),b},m.setTitle=function(a){var b=a.title,c;b||(c=m.getStateByIndex(0),c&&c.url===a.url&&(b=c.title||m.options.initialTitle));try{d.getElementsByTagName("title")[0].innerHTML=b.replace("<","&lt;").replace(">","&gt;").replace(" & "," &amp; ")}catch(e){}return d.title=b,m},m.queues=[],m.busy=function(a){typeof a!="undefined"?m.busy.flag=a:typeof m.busy.flag=="undefined"&&(m.busy.flag=!1);if(!m.busy.flag){h(m.busy.timeout);var b=function(){var a,c,d;if(m.busy.flag)return;for(a=m.queues.length-1;a>=0;--a){c=m.queues[a];if(c.length===0)continue;d=c.shift(),m.fireQueueItem(d),m.busy.timeout=g(b,m.options.busyDelay)}};m.busy.timeout=g(b,m.options.busyDelay)}return m.busy.flag},m.busy.flag=!1,m.fireQueueItem=function(a){return a.callback.apply(a.scope||m,a.args||[])},m.pushQueue=function(a){return m.queues[a.queue||0]=m.queues[a.queue||0]||[],m.queues[a.queue||0].push(a),m},m.queue=function(a,b){return typeof a=="function"&&(a={callback:a}),typeof b!="undefined"&&(a.queue=b),m.busy()?m.pushQueue(a):m.fireQueueItem(a),m},m.clearQueue=function(){return m.busy.flag=!1,m.queues=[],m},m.stateChanged=!1,m.doubleChecker=!1,m.doubleCheckComplete=function(){return m.stateChanged=!0,m.doubleCheckClear(),m},m.doubleCheckClear=function(){return m.doubleChecker&&(h(m.doubleChecker),m.doubleChecker=!1),m},m.doubleCheck=function(a){return m.stateChanged=!1,m.doubleCheckClear(),m.bugs.ieDoubleCheck&&(m.doubleChecker=g(function(){return m.doubleCheckClear(),m.stateChanged||a(),!0},m.options.doubleCheckInterval)),m},m.safariStatePoll=function(){var b=m.extractState(d.location.href),c;if(!m.isLastSavedState(b))c=b;else return;return c||(c=m.createStateObject()),m.Adapter.trigger(a,"popstate"),m},m.back=function(a){return a!==!1&&m.busy()?(m.pushQueue({scope:m,callback:m.back,args:arguments,queue:a}),!1):(m.busy(!0),m.doubleCheck(function(){m.back(!1)}),n.go(-1),!0)},m.forward=function(a){return a!==!1&&m.busy()?(m.pushQueue({scope:m,callback:m.forward,args:arguments,queue:a}),!1):(m.busy(!0),m.doubleCheck(function(){m.forward(!1)}),n.go(1),!0)},m.go=function(a,b){var c;if(a>0)for(c=1;c<=a;++c)m.forward(b);else{if(!(a<0))throw new Error("History.go: History.go requires a positive or negative integer passed.");for(c=-1;c>=a;--c)m.back(b)}return m};if(m.emulated.pushState){var o=function(){};m.pushState=m.pushState||o,m.replaceState=m.replaceState||o}else m.onPopState=function(b,c){var e=!1,f=!1,g,h;return m.doubleCheckComplete(),g=m.getHash(),g?(h=m.extractState(g||d.location.href,!0),h?m.replaceState(h.data,h.title,h.url,!1):(m.Adapter.trigger(a,"anchorchange"),m.busy(!1)),m.expectedStateId=!1,!1):(e=m.Adapter.extractEventData("state",b,c)||!1,e?f=m.getStateById(e):m.expectedStateId?f=m.getStateById(m.expectedStateId):f=m.extractState(d.location.href),f||(f=m.createStateObject(null,null,d.location.href)),m.expectedStateId=!1,m.isLastSavedState(f)?(m.busy(!1),!1):(m.storeState(f),m.saveState(f),m.setTitle(f),m.Adapter.trigger(a,"statechange"),m.busy(!1),!0))},m.Adapter.bind(a,"popstate",m.onPopState),m.pushState=function(b,c,d,e){if(m.getHashByUrl(d)&&m.emulated.pushState)throw new Error("History.js does not support states with fragement-identifiers (hashes/anchors).");if(e!==!1&&m.busy())return m.pushQueue({scope:m,callback:m.pushState,args:arguments,queue:e}),!1;m.busy(!0);var f=m.createStateObject(b,c,d);return m.isLastSavedState(f)?m.busy(!1):(m.storeState(f),m.expectedStateId=f.id,n.pushState(f.id,f.title,f.url),m.Adapter.trigger(a,"popstate")),!0},m.replaceState=function(b,c,d,e){if(m.getHashByUrl(d)&&m.emulated.pushState)throw new Error("History.js does not support states with fragement-identifiers (hashes/anchors).");if(e!==!1&&m.busy())return m.pushQueue({scope:m,callback:m.replaceState,args:arguments,queue:e}),!1;m.busy(!0);var f=m.createStateObject(b,c,d);return m.isLastSavedState(f)?m.busy(!1):(m.storeState(f),m.expectedStateId=f.id,n.replaceState(f.id,f.title,f.url),m.Adapter.trigger(a,"popstate")),!0};if(f){try{m.store=k.parse(f.getItem("History.store"))||{}}catch(p){m.store={}}m.normalizeStore()}else m.store={},m.normalizeStore();m.Adapter.bind(a,"beforeunload",m.clearAllIntervals),m.Adapter.bind(a,"unload",m.clearAllIntervals),m.saveState(m.storeState(m.extractState(d.location.href,!0))),f&&(m.onUnload=function(){var a,b;try{a=k.parse(f.getItem("History.store"))||{}}catch(c){a={}}a.idToState=a.idToState||{},a.urlToId=a.urlToId||{},a.stateToId=a.stateToId||{};for(b in m.idToState){if(!m.idToState.hasOwnProperty(b))continue;a.idToState[b]=m.idToState[b]}for(b in m.urlToId){if(!m.urlToId.hasOwnProperty(b))continue;a.urlToId[b]=m.urlToId[b]}for(b in m.stateToId){if(!m.stateToId.hasOwnProperty(b))continue;a.stateToId[b]=m.stateToId[b]}m.store=a,m.normalizeStore(),f.setItem("History.store",k.stringify(a))},m.intervalList.push(i(m.onUnload,m.options.storeInterval)),m.Adapter.bind(a,"beforeunload",m.onUnload),m.Adapter.bind(a,"unload",m.onUnload));if(!m.emulated.pushState){m.bugs.safariPoll&&m.intervalList.push(i(m.safariStatePoll,m.options.safariPollInterval));if(e.vendor==="Apple Computer, Inc."||(e.appCodeName||"")==="Mozilla")m.Adapter.bind(a,"hashchange",function(){m.Adapter.trigger(a,"popstate")}),m.getHash()&&m.Adapter.onDomLoad(function(){m.Adapter.trigger(a,"hashchange")})}},m.init()}(window)

Step 3: Modifying the “header.php” File in Your WordPress Theme

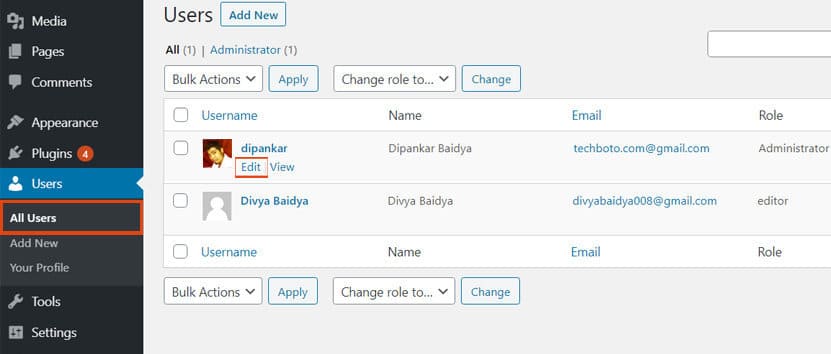
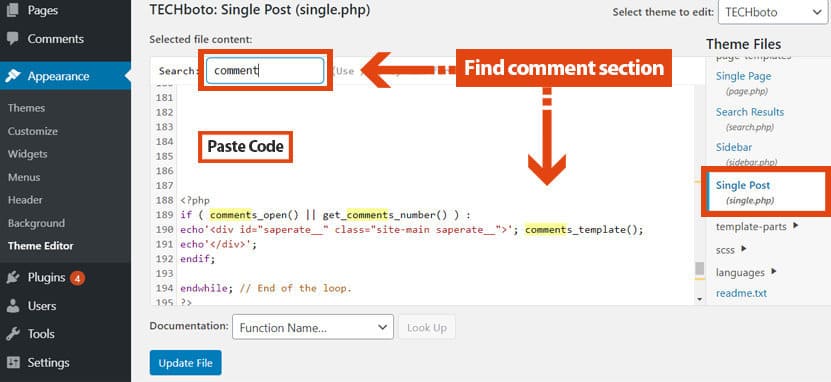
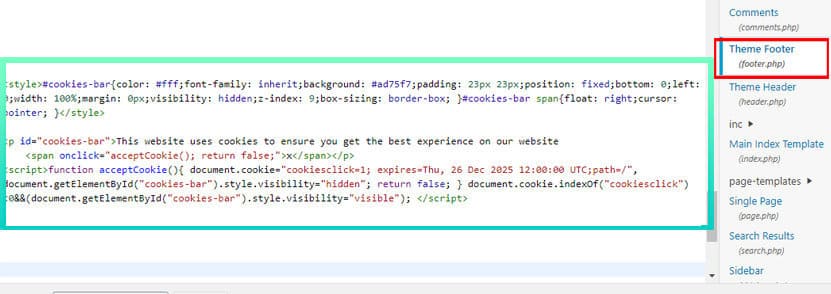
To proceed, log in to your WordPress admin panel and navigate to “Appearance” -> “Theme Editor”. In the Theme Editor, locate and select the “header.php” file. Inside this file, paste the provided code. This code snippet will be responsible for including the necessary JavaScript files and initiating the AJAX loading functionality on your website.

<script type='text/javascript' src='<?php echo get_template_directory_uri(); ?>/loader_boom/ajax__history.js?ver=5.3.2'></script>
<script type='text/javascript' src='<?php echo get_template_directory_uri(); ?>/loader_boom/ajax__loads.js?ver=5.3.2'></script>
<script> var reload_helper = {"rootUrl":"http:\/\/<?php echo $_SERVER['HTTP_HOST']; ?>\/\/","ids":"","container_id":"main","mcdc":"menu","searchID":"searchform","transition":"","scrollTop":"","loader":"","bp_status":""}; </script>

I trust that this guide has provided you with a solid foundation for creating your own “without-page-refresh” solutions. This method is applicable to any WordPress website and offers an excellent approach to optimize resource-heavy components that don’t need to be loaded immediately, such as a sizable dropdown list of products. By following these straightforward steps, you can effortlessly load these components using jQuery AJAX.

Note: Please be aware that while the provided source code is intended to function on both local and live servers, there is a chance that it may become outdated, resulting in issues. If you encounter any difficulties, it is advisable to seek updated source code or explore alternative solutions to ensure optimal performance. Stay up to date with the latest practices and consider consulting relevant documentation or online resources for the most current techniques.